Practical guide
How to turn a photo into a cross stitch pattern that is easy to stitch
A good conversion keeps the part of the picture you care about and removes detail that would become colour noise or scattered single stitches. The trick is to make those decisions in the right order: photo, crop, physical size, fabric count, rendering, then cleanup.
Choose a photo with one obvious subject
Cross stitch has a fixed grid and a limited thread palette. It cannot preserve every hair, reflection, leaf, or blurred colour transition in a photograph. Give the converter a clear hierarchy: one subject first, supporting detail second, background last.
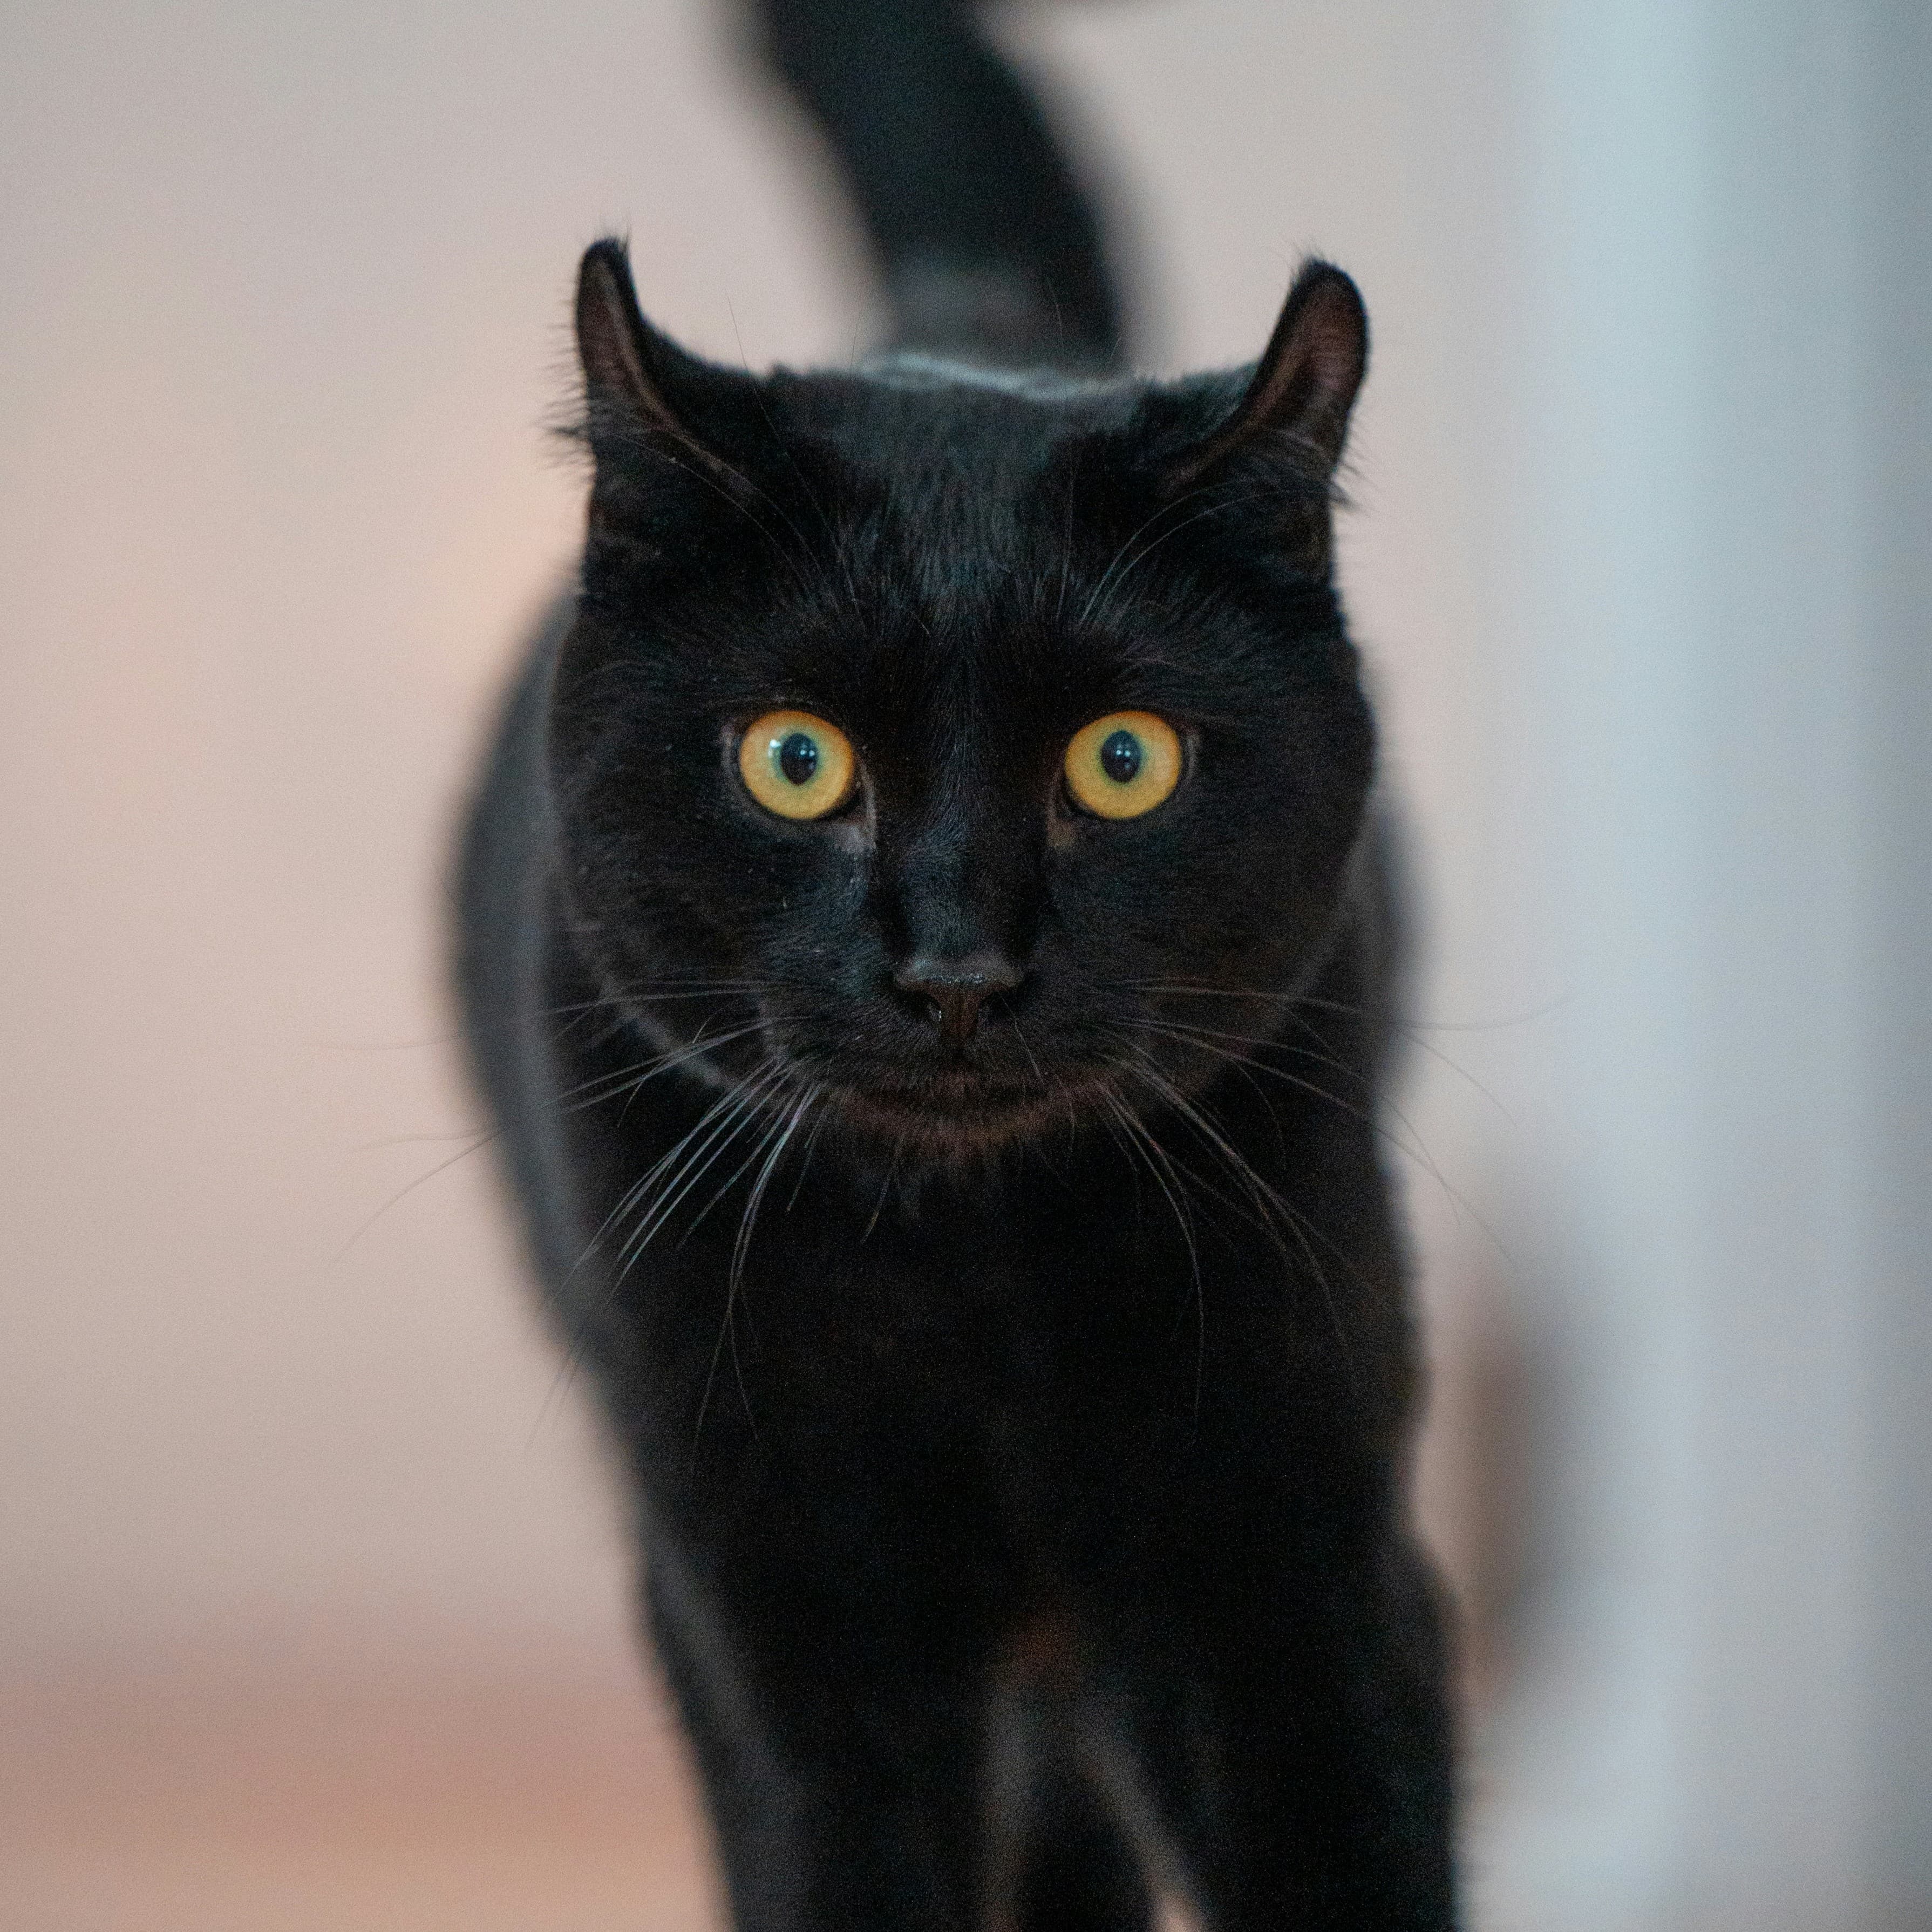
The black cat works because the eyes and silhouette remain readable when the fur is reduced to large dark shapes. The blurred background is quiet enough to support the cat without competing with it. Close-up pets, portraits, flowers, signs, ornaments, and simple objects often behave well for the same reason.
Crop before asking for more detail
Pattern size is finite. If the subject fills only half the frame, half the grid is spent describing the surroundings. Reframe the image so the important edges, face, or flower head receive most of the available stitches.
Use Remove background when the setting creates noisy colour changes around an otherwise strong subject. Background removal is not mandatory: a soft, low-contrast background can help the final piece feel less like a cut-out. Keep it when it adds context; remove it when it adds confetti.
Set the finished size, then choose the Aida count
Finished size and fabric count work together. At the same physical size, higher-count Aida fits more stitches into each inch. That gives the converter more cells for curves and shading, but it also creates a longer project with smaller stitches.
For a 15 cm square pattern, StitchBitz produces approximately the following grids. The finished dimensions remain the same; only the stitch density changes.
| Aida count | 15 cm grid | Practical effect |
|---|---|---|
| 11-count | 65 × 65 | Bold blocks and fewer stitches |
| 14-count | 83 × 83 | A practical balance for most photos |
| 16-count | 94 × 94 | Finer shading in the same 15 cm space |
| 18-count | 106 × 106 | Most detail, smallest stitches |
If you are unsure, 14-count Aida is a sensible starting point. StitchBitz supports finished pieces up to 30 × 20 cm.
Balance recognisable detail against stitchability
The rendering model decides how the picture is reduced; Stitchability decides how aggressively isolated colour changes are merged. Start with Preserve shape for defined silhouettes and graphic subjects. Try Rich detail when subtle texture or shading carries the likeness.
Then use the Stitchability slider. Moving toward Detail keeps more small colour changes. Moving toward Easy merges more of them into contiguous areas. Do not chase a perfect preview at full zoom: inspect whether the chart will still be pleasant to count and stitch.
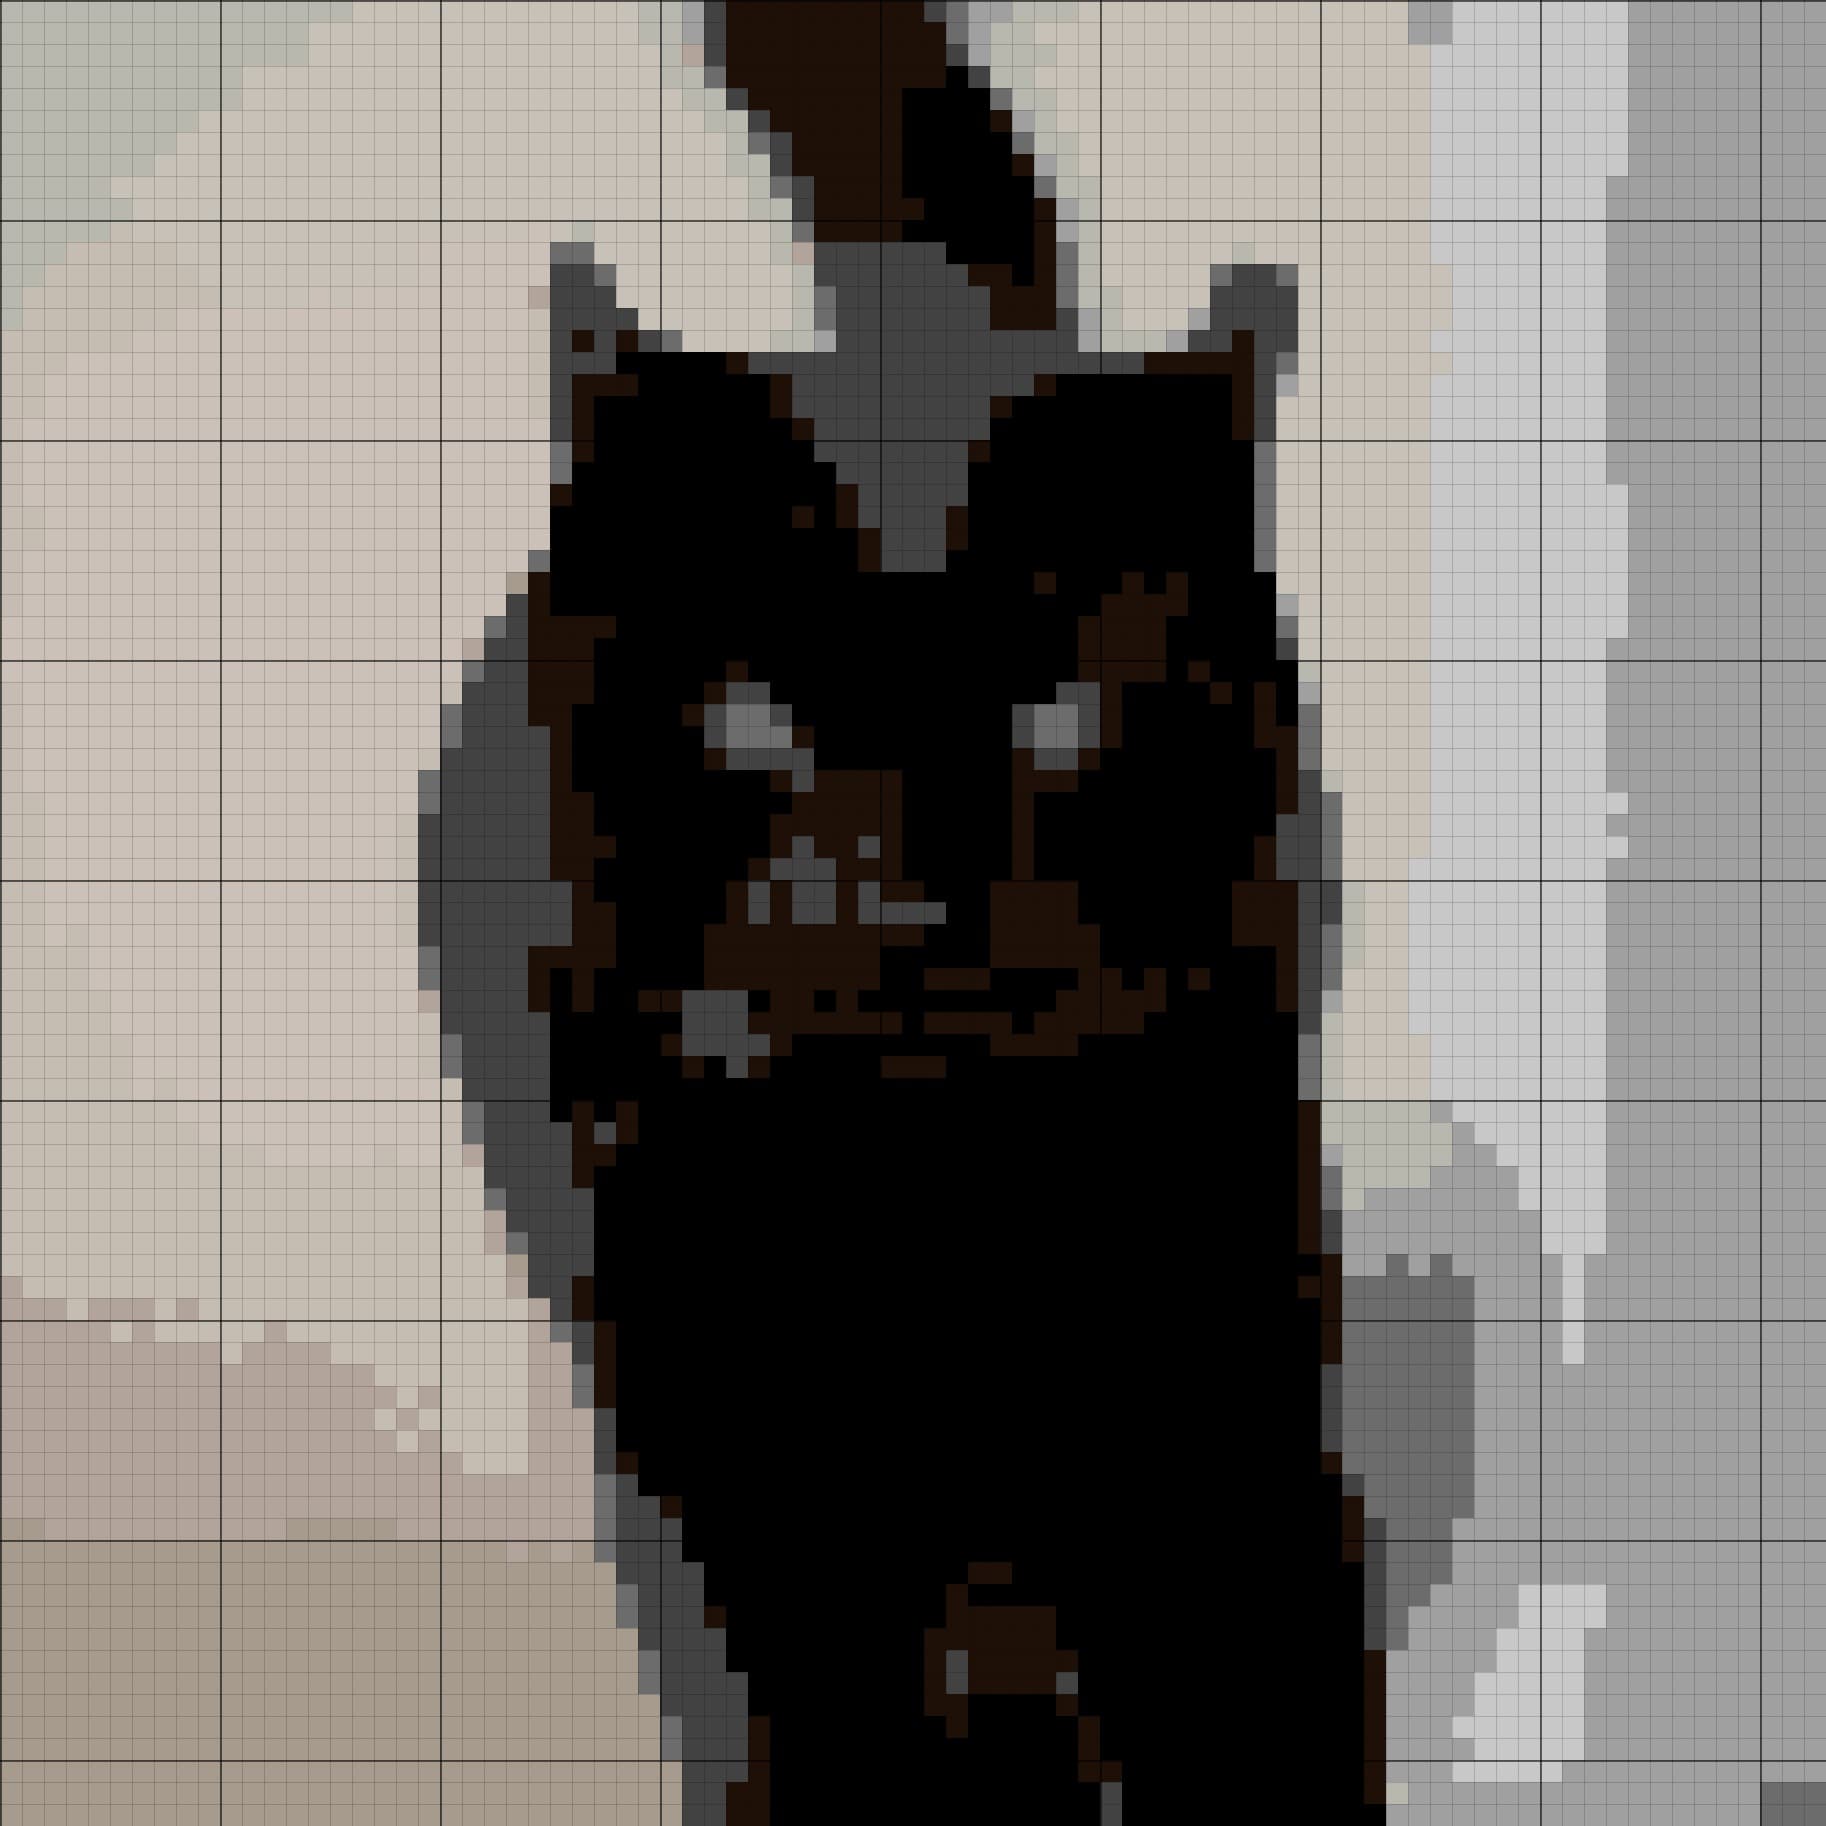
Smoother profile
Black cat
- Grid
- 83 × 83
- Aida
- 14-count
- Stitchability
- 62
- Final colours
- 12
Large dark regions and a restrained palette make this the more approachable of the two charts.
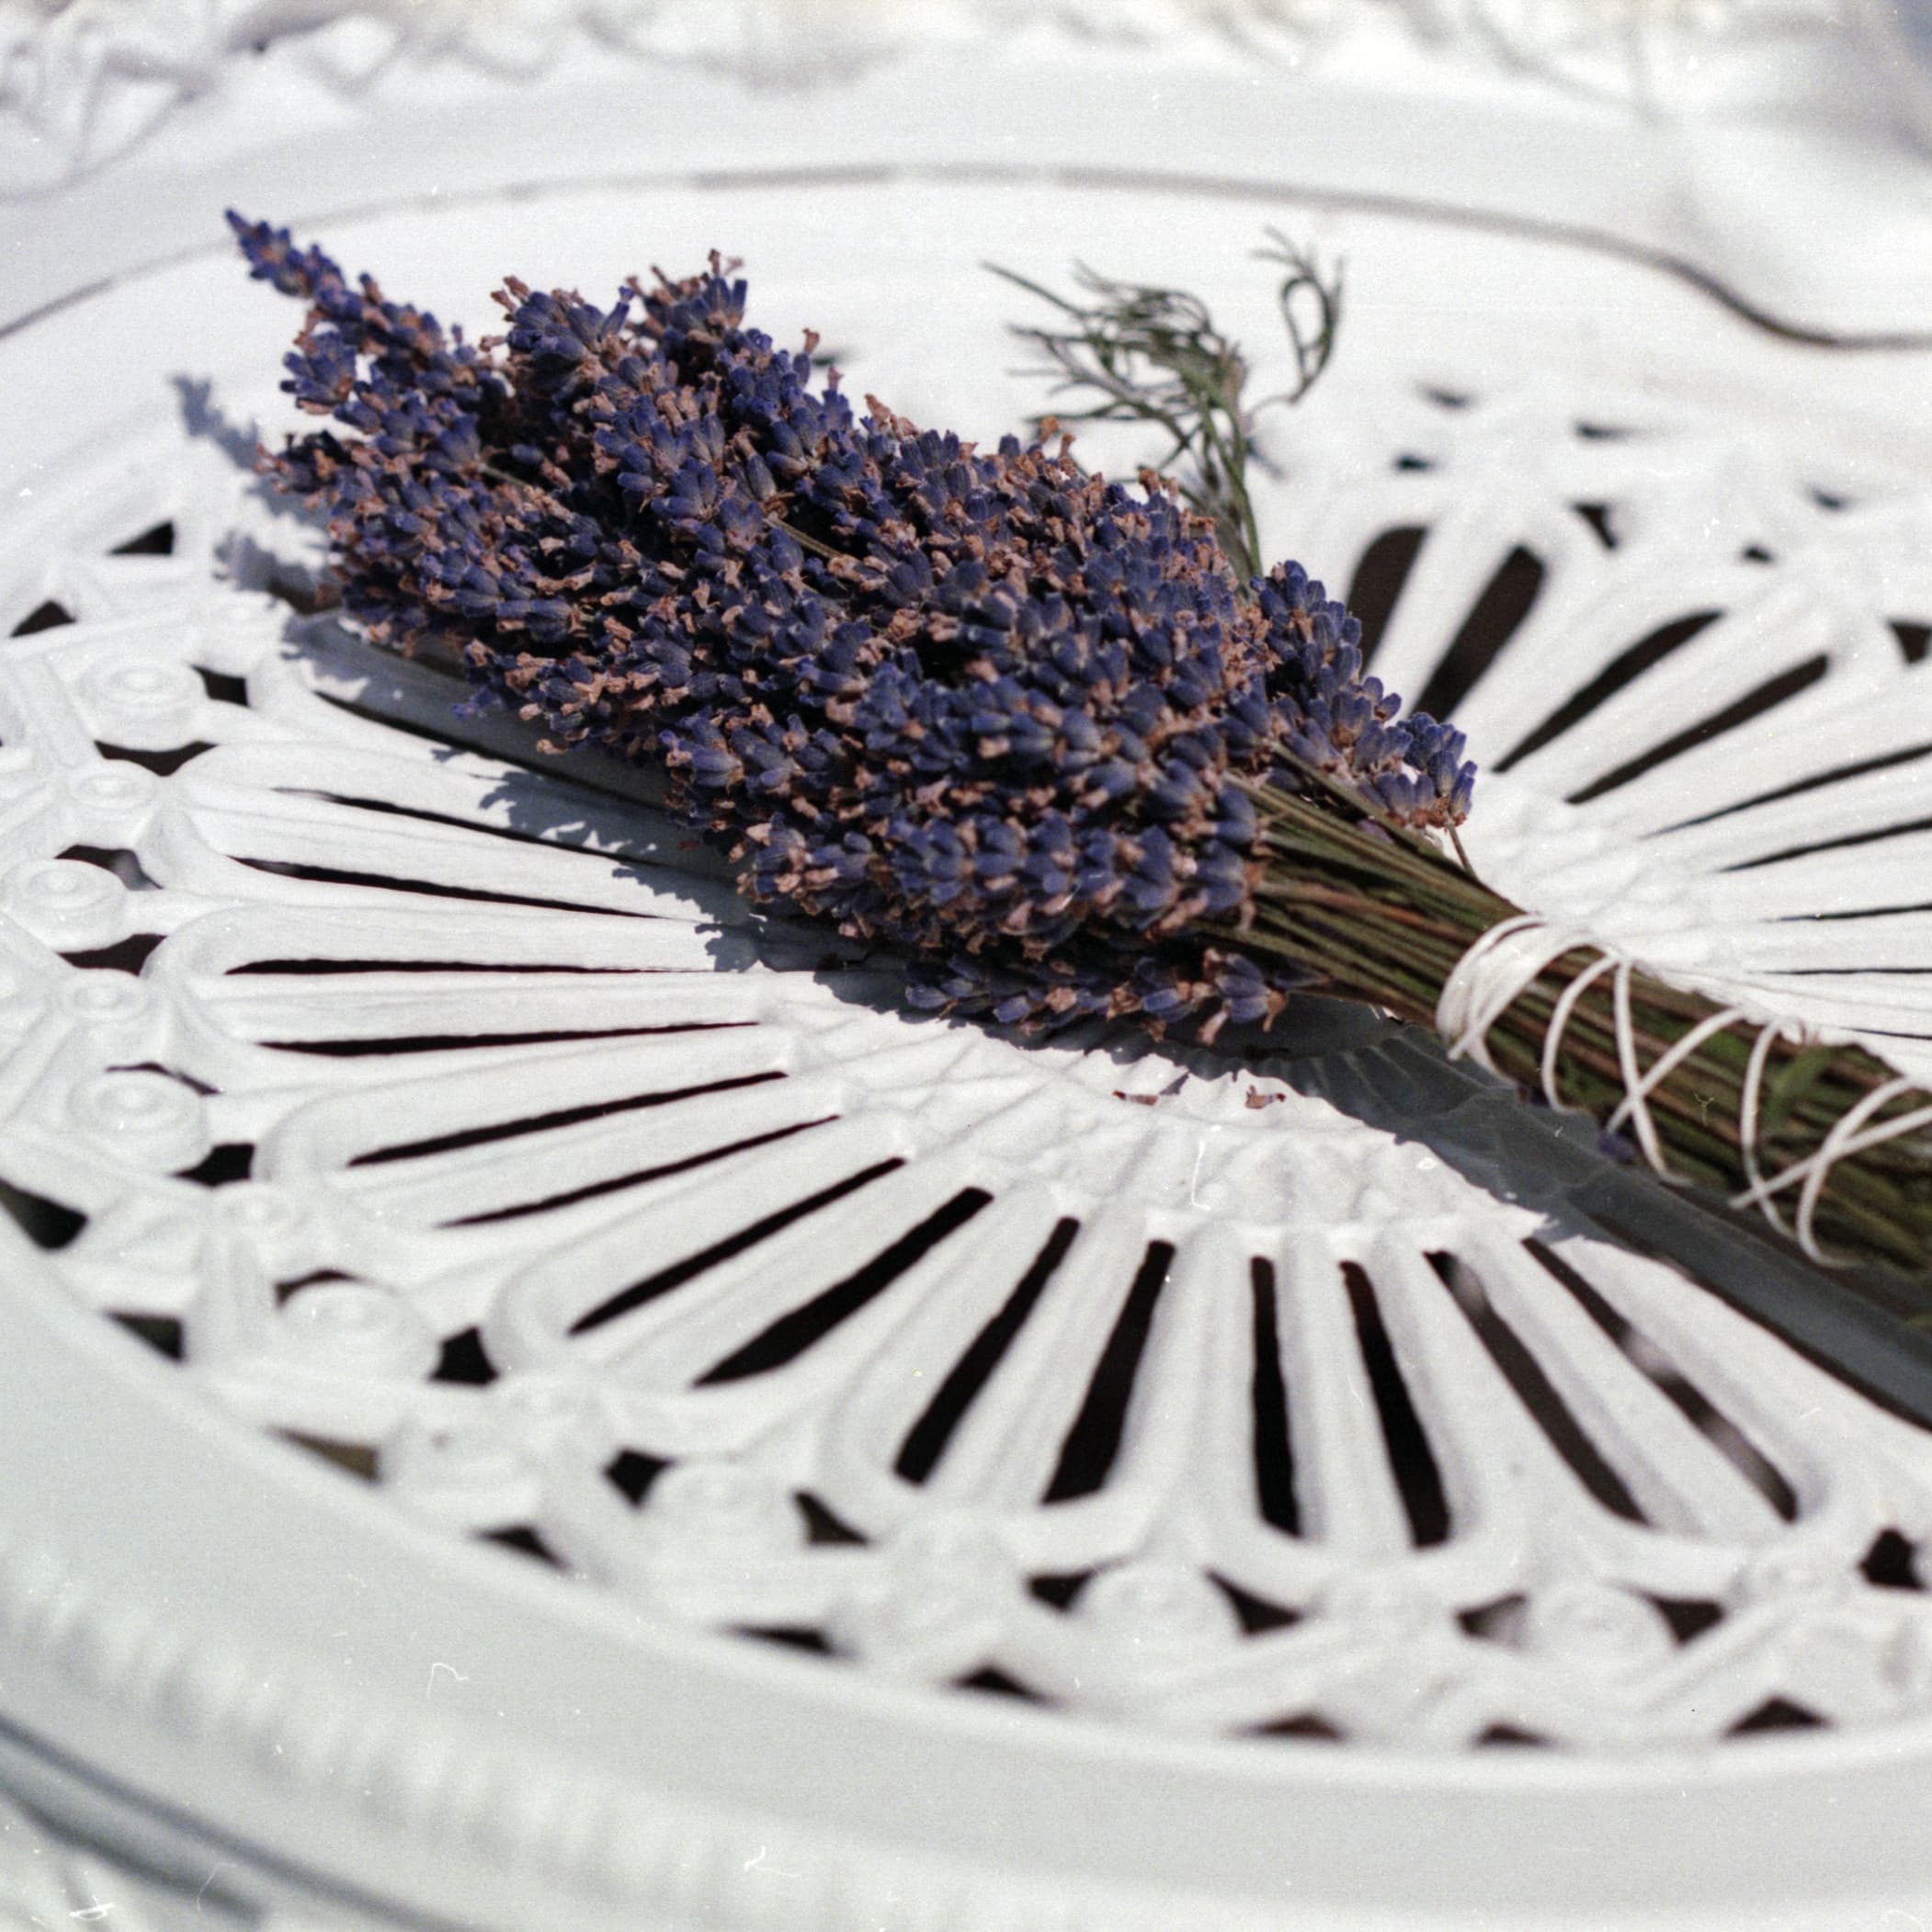
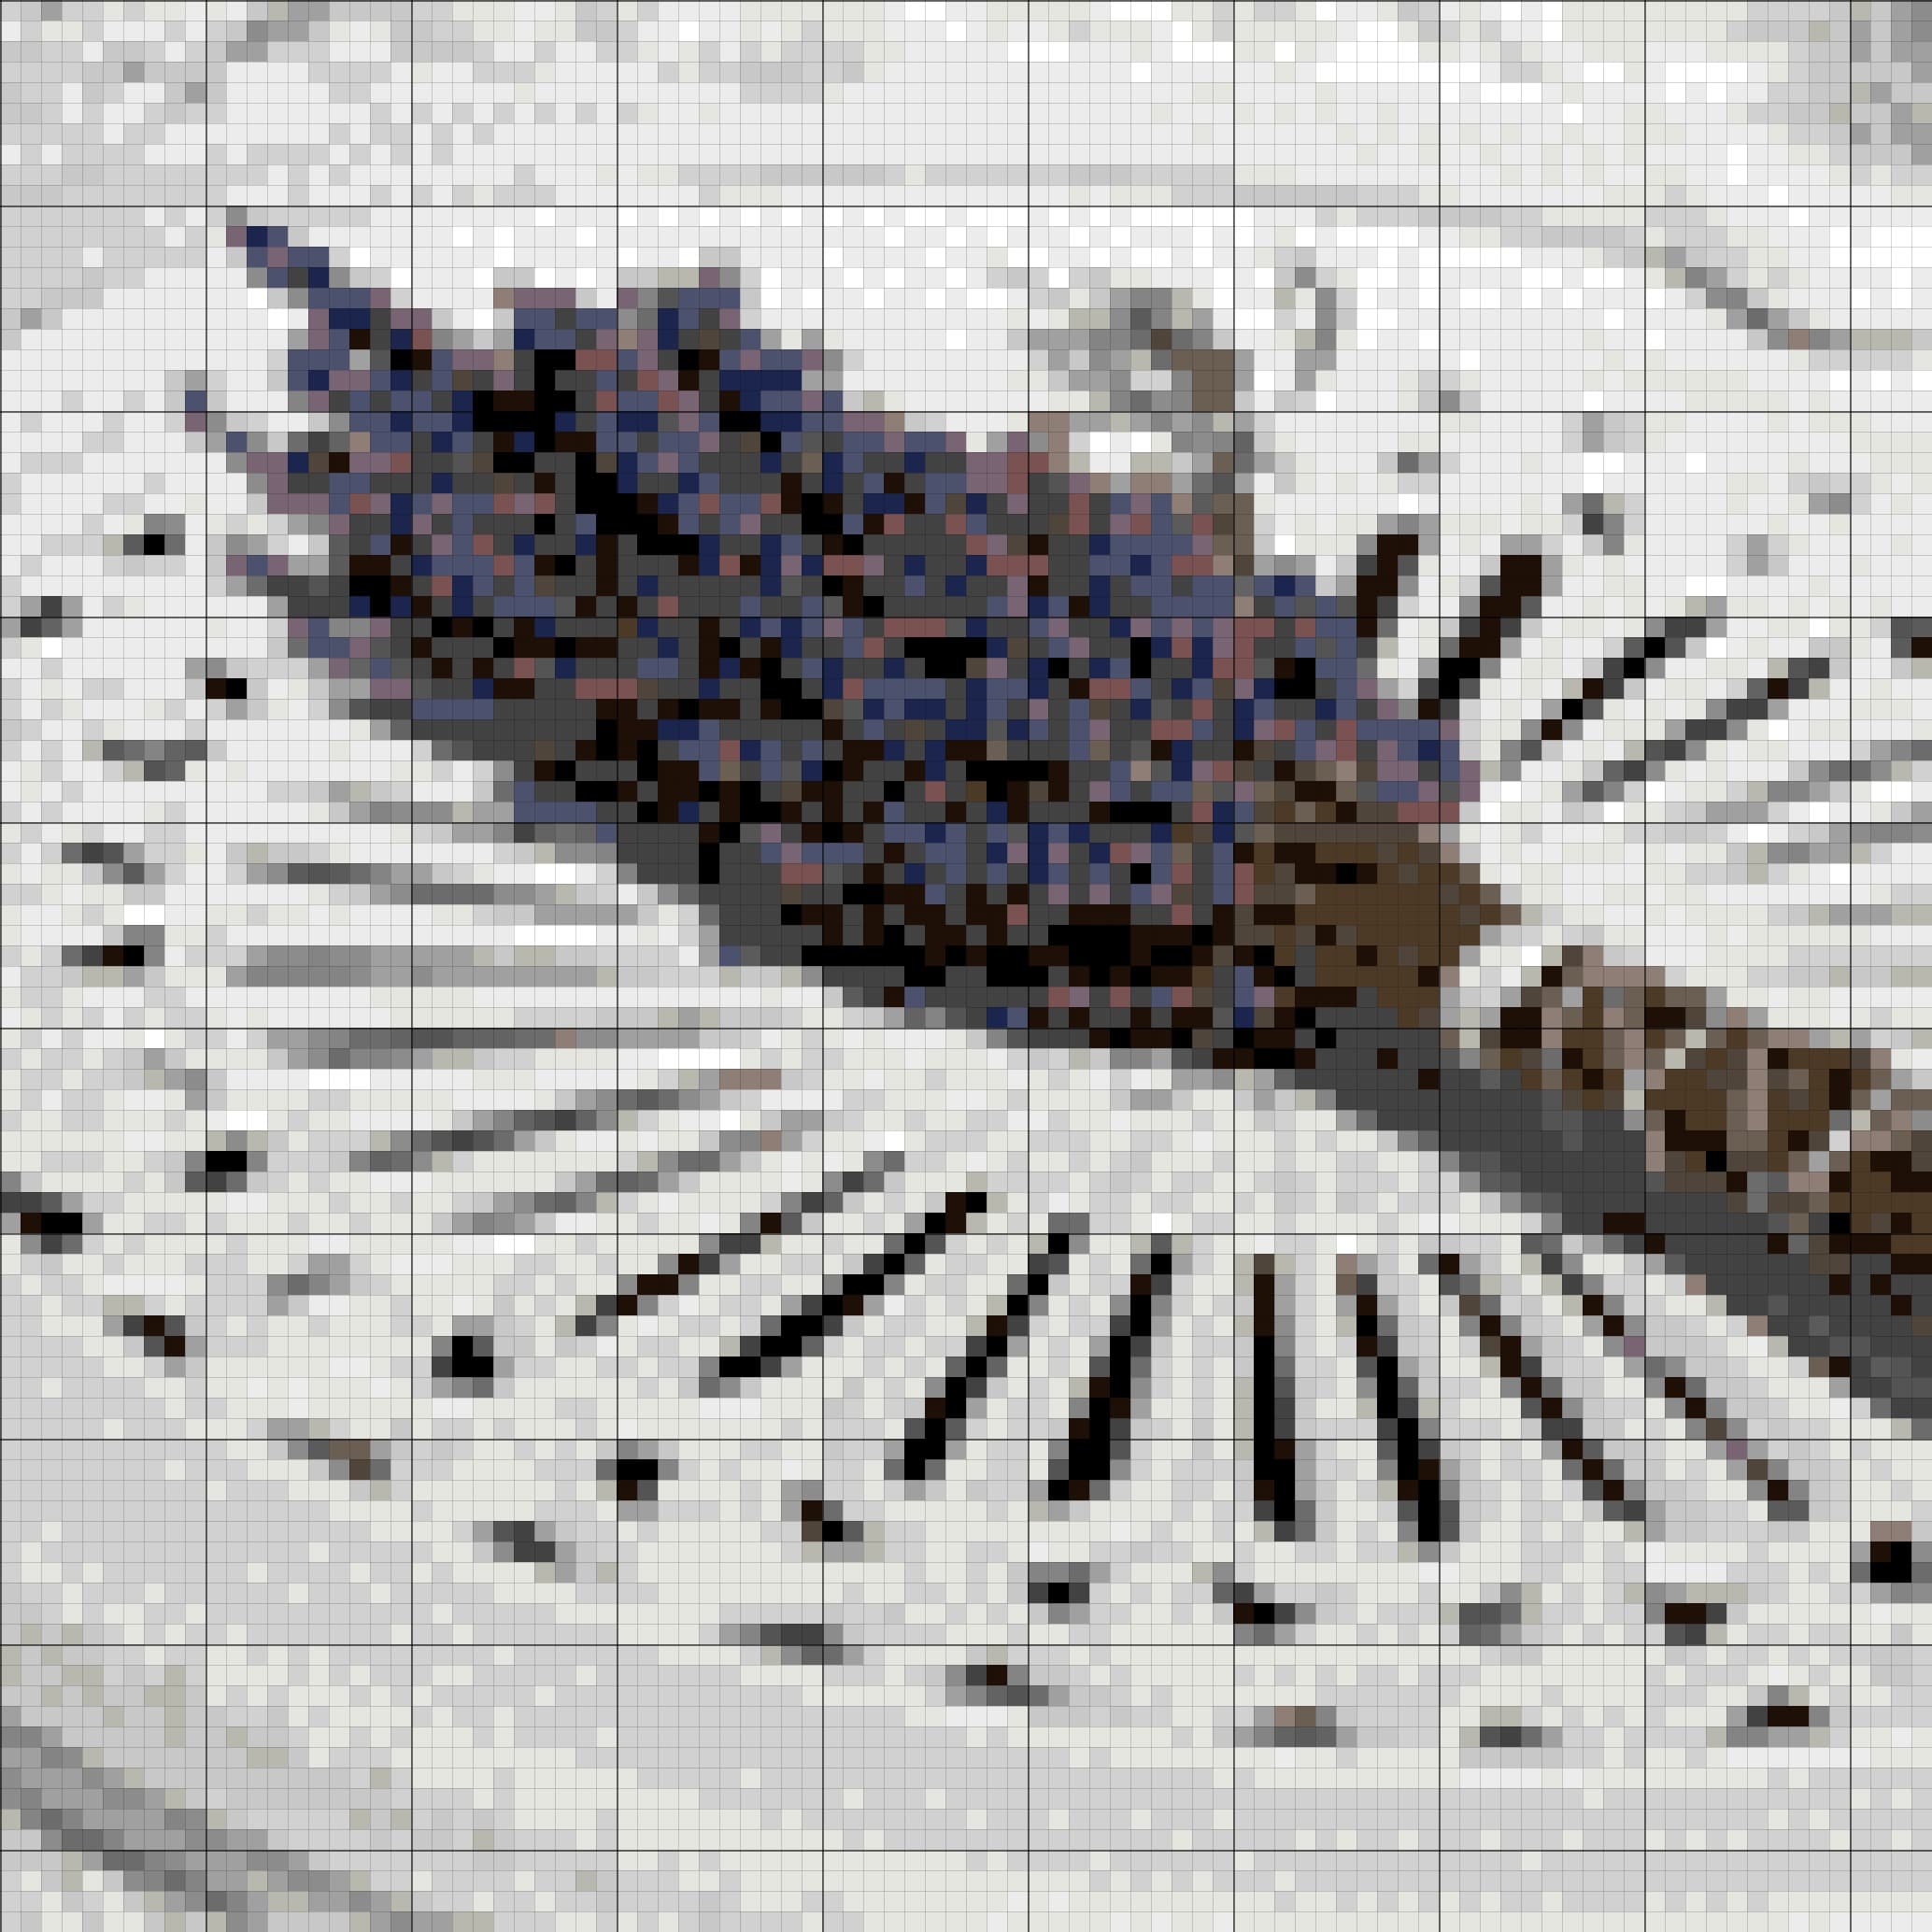
Detail profile
Lavender bouquet
- Grid
- 94 × 94
- Aida
- 16-count
- Stitchability
- 12
- Final colours
- 24
The extra cells and colours retain thin stems, small florets, plate shadows, and soft tonal variation.
Generate a draft and inspect it like a stitcher
The first chart is a draft, not a verdict. Before adjusting controls, look at the result at normal viewing size and ask whether the subject reads clearly. Then zoom in and inspect the places that will cost time once you start stitching.
- 1Check the silhouette and focal features before worrying about tiny texture.
- 2Look for single stitches or tiny islands that force frequent thread changes.
- 3Compare similar palette colours and decide whether each one earns its place.
- 4Check that highlights and shadows do not erase facial features, lettering, or thin stems.
- 5Regenerate after one meaningful change rather than moving every control at once.
Try these decisions on your own picture
Generate a private first draft in your browser, then refine it while the advice is fresh.
Open the free generatorClean the chart without sanding away its character
Automatic conversion gets you to a workable structure. Manual editing is where you decide which imperfections matter. Start with isolated stitches in low-priority areas, merge colours that are visually interchangeable, and protect the few details that carry the likeness.
Backstitch is most useful for selective edges: an eye line, whisker, flower stem, letter, or object contour. Outlining everything usually makes a photo conversion feel flatter, not clearer.
Export, then check the chart before buying thread
StitchBitz exports a printable PDF with the symbol chart, DMC floss list, and project details, plus a high-resolution JPG. Before treating the pattern as final, confirm the grid dimensions, fabric count, finished size, and palette.
For a colour-sensitive subject, test the focal colours on a scrap of the intended fabric. A phone or monitor emits light; thread reflects it, so the physical result will never match the screen perfectly.
Troubleshooting
What to change when the first pattern is not right
The face or focal point looks muddy
Crop closer, increase the finished size, or move Stitchability toward Detail so important colour changes survive.
There are isolated stitches everywhere
Move Stitchability toward Easy, simplify or remove the background, and check whether several near-identical colours can be merged.
The subject is too small in the chart
Reframe the photo before generating. Empty background still consumes stitches even when it looks visually quiet.
The result has lost important texture
Try Rich detail, lower the Stitchability value, or use a larger grid. Change one control at a time so you can see what helped.
The thread colours look different from the screen
Trust the DMC codes rather than the monitor preview, and stitch a small swatch when an exact skin, flower, or brand colour matters.
Make the first draft, then make it yours
Upload a photo, choose the physical project size, and generate an editable DMC chart. Your picture stays on your device, and PDF and JPG downloads are free.